
Studying becomes difficult when lecture slides, readings, notes, and useful links are scattered across different places. NotebookLM can bring those materials into one workspace and help you explore them with AI. Unlike a general chatbot that may answer from broad model knowledge or the web, NotebookLM is designed to work from the sources you place in a notebook.
That makes it useful for reviewing a module, comparing readings, preparing for an exam, or planning a research assignment. It does not make every answer correct, and it cannot replace reading the original material. Used carefully, however, it can help you move from collecting information to actively working with it.
This guide explains how to use NotebookLM for studying in 2026, from setting up a focused notebook to checking citations and building a repeatable revision routine.
What Is NotebookLM?
NotebookLM is Google’s AI-powered research and note-taking tool. You create a notebook, add sources, and then ask questions about those materials. According to Google’s current documentation, supported sources include PDFs, websites, copied text, Google Docs, Google Slides, Word files, PowerPoint files, audio, public YouTube videos with captions, and several other formats.
The tool can summarize sources, answer questions with inline citations, and transform material into outputs such as study guides, briefing documents, mind maps, flashcards, quizzes, and Audio Overviews. Exact features, account eligibility, and usage limits can vary, so check the current options available in your account.
Why source-grounded answers matter
A source-grounded answer gives you a visible path back to the material behind it. That is valuable when you need to check a definition, locate a quotation, or see whether two authors genuinely disagree. It is still your responsibility to open the citation and confirm that the original passage supports the answer.
Step 1: Create One Notebook for One Clear Purpose
Start by signing in and creating a new notebook. Give it a specific name such as “Biology Midterm — Cell Division” or “History Essay — Causes of the Cold War.” A notebook called “Semester Notes” may sound convenient, but mixing unrelated subjects makes the source collection harder to navigate and your questions less precise.
Define the outcome before adding files
Write down what you want the notebook to help you accomplish. Are you revising for an exam, comparing academic arguments, learning unfamiliar terminology, or outlining an essay? A clear outcome will help you decide which sources belong in the notebook and which do not.
For exam revision, you might include the official syllabus, lecture slides, assigned chapters, and your own cleaned notes. For an essay, you might create a separate notebook containing the assignment brief, marking rubric, required readings, and research papers you have evaluated.
Step 2: Add Reliable, Relevant Sources
Open the Sources panel and upload or link the material you are allowed to use. Google states that free users can include up to 50 sources in a notebook, although limits can change. Each imported source is a copy or synchronized version used by the system when responding to your requests.
Choose quality over quantity
Adding every search result is not a good research strategy. Begin with course-approved material and primary or authoritative sources. Check the author, publisher, date, evidence, and relevance before adding an external page. A notebook filled with weak sources can produce a neatly organized but weak answer.
Use clear source names. “Week 4 — Lecture Slides” is more helpful than “slides-final-v2.” If you upload several papers, keep the author’s name and publication year in the title. Good labels make it easier to ask targeted questions later.
Understand what gets imported
A web URL generally contributes the page’s text rather than every image, video, or nested page. A public YouTube source relies on its transcript, so transcription mistakes may affect the result. Google Drive sources can synchronize, but comments and footnotes may not be imported. Always compare important details with the original file.
Do not upload private records, personal data, confidential research, copyrighted material you lack permission to share, or assessment content your institution prohibits you from processing with AI.
Step 3: Start With a Source Map
Before requesting detailed answers, ask NotebookLM to describe the source collection. This helps you understand what is present, what is missing, and where sources overlap.
Useful opening prompts include:
- “List the main topics covered across these sources and name the source for each topic.”
- “Which course objectives appear in these materials, and which objectives have little coverage?”
- “Create a glossary of essential terms using only the selected sources.”
- “Compare the arguments in the two assigned readings without deciding which is correct.”
Keep the request narrow enough to inspect. A focused table or short list is easier to verify than a long, general summary.
Step 4: Ask Questions That Produce Active Learning
Summaries can help you get oriented, but reading summaries repeatedly is passive. Stronger prompts make you recall, explain, compare, and apply knowledge.
Use retrieval practice
Ask for questions without immediate answers. For example: “Create ten short-answer questions from the selected lecture notes. Ask one at a time, wait for my response, then give feedback with a citation.” This forces you to retrieve information before seeing the solution.
You can also request a mix of difficulty levels: definitions first, then explanations, comparisons, and application scenarios. If NotebookLM creates a question outside your course scope, remove it rather than memorizing irrelevant material.
Use the teach-back method
Explain a concept in your own words and ask the tool to compare your explanation with the sources. A useful prompt is: “Using the cited material, identify what my explanation gets right, what it misses, and any statement that needs correction.” Then revise your explanation yourself.
Look for disagreement and uncertainty
For subjects with competing interpretations, ask where sources agree, disagree, or use different definitions. Request citations for each comparison. Do not ask the system to flatten a genuine debate into one supposedly correct answer.
Step 5: Turn Sources Into Study Materials
NotebookLM’s Studio features can convert a source collection into different learning formats. Depending on your account and current product availability, these may include study guides, mind maps, flashcards, quizzes, reports, and Audio Overviews.
Study guides and briefing documents
Generate a first draft of a study guide, then edit it. Add topics the system missed, remove content outside the syllabus, and link each section to your own notes. The finished guide should reflect the course objectives—not simply whatever the AI selected as important.
Mind maps
A mind map can reveal relationships among people, events, processes, or concepts. Use it to identify branches you cannot explain without looking. Those weak branches become priorities for the next study session.
Audio Overviews
Audio Overviews turn source material into a conversational audio format. They can be helpful during a walk or as an introduction to unfamiliar material, but they should supplement rather than replace close reading. Listen with a question in mind, write down claims you want to verify, and return to the cited source afterward.
Step 6: Verify Answers and Citations
Source grounding reduces some risks but does not eliminate mistakes. An answer can omit a qualification, merge claims from different passages, or misunderstand a table. Treat every important output as a draft that needs checking.
- Open the citation attached to the claim.
- Read enough surrounding text to understand the context.
- Confirm names, dates, definitions, and numerical values in the original.
- Check whether the source itself is reliable and current.
- Record the original source—not NotebookLM—as the reference for your assignment.
If you cannot trace a statement to an appropriate source, do not use it as fact. Ask the question again with fewer sources selected or consult the original material directly.
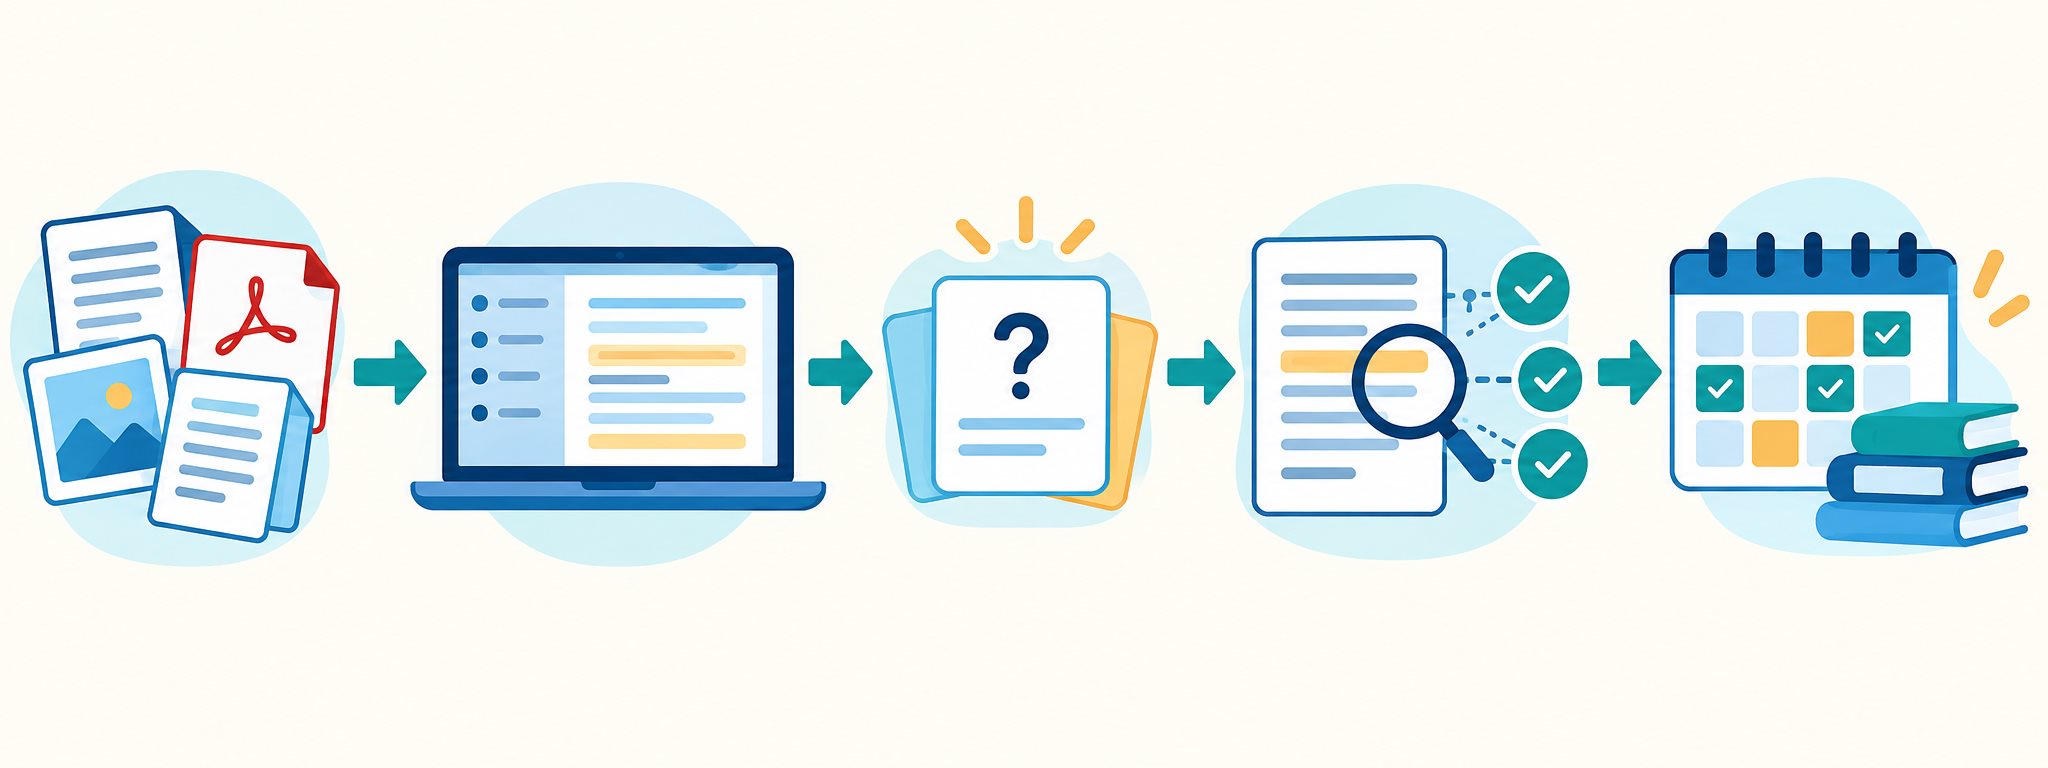
Step 7: Build a Simple Weekly Workflow
A consistent routine is more useful than generating many outputs. Try this process at the end of each study week:
- Add the week’s approved readings, slides, and revised notes.
- Ask for a short map of the new concepts and how they connect to earlier material.
- Create five recall questions and answer them without notes.
- Use citations to correct incomplete answers.
- Write a 150-word summary in your own words.
- Ask for feedback on missing concepts, then revise the summary yourself.
- Save unresolved questions to ask your teacher or investigate in reliable sources.
This workflow keeps you involved in the thinking. NotebookLM organizes prompts and feedback, while you remain responsible for understanding and final decisions.
For a broader approach to evaluating sources, use the verification steps in Sensaiteach’s safe AI research guide. If your next step is retrieval practice, compare the methods in the guide to AI study notes and flashcards.
Common NotebookLM Mistakes to Avoid
Uploading too much material at once
More sources do not automatically create better answers. Large, mixed collections make it harder to know which material shaped a response. Split broad subjects into focused notebooks or select only the sources relevant to your current question.
Trusting a citation without opening it
A citation is a verification tool, not a guarantee. Open it, inspect the context, and make sure your interpretation is fair.
Using generated work as a submission
Submitting AI-generated writing may violate academic rules and prevent real learning. Use the tool for questions, planning, comparison, and feedback. Write the assessed response yourself and disclose AI assistance whenever your institution requires it.
Ignoring privacy and account rules
School-managed Google accounts may have different features or policies. Check institutional guidance before uploading course material or research data, especially when other people’s information is involved.
Is NotebookLM Free for Students?
NotebookLM offers standard access without a paid AI subscription, subject to account, age, region, feature, and usage limits. Google’s paid AI plans provide expanded limits and additional capabilities. Because plans change, consult the official NotebookLM Help Center for current details instead of relying on an old feature list.
Final Thoughts
NotebookLM is most useful when you already have a purposeful collection of trustworthy material. It can help you navigate that collection, ask better questions, generate practice activities, and find the passage behind an answer. Its value comes from making sources easier to work with—not from removing the need to read, think, and verify.
Start with one focused notebook and one genuine study goal. Add a small set of reliable sources, practise recalling the ideas, and check every important citation. Used this way, NotebookLM can become a practical part of a responsible study routine rather than another shortcut that produces more information than understanding.